Leaking Flanged Pipe Joints: Gasket, Alignment, or Bolt Load Problem?
A leak at flanged pipe joints does not automatically mean the gasket has failed. A damaged seal, misaligned flanges, and uneven bolt loading can all leave a similar wet patch. Replacing the gasket may stop the leak temporarily, but it will return if the joint still pulls sideways or compresses the seal unevenly.
The most useful distinction is this: gasket problems affect the sealing material; alignment problems affect how the faces meet; bolt-load problems affect how evenly they hold the gasket. These causes often overlap. Before tightening anything, isolate, depressurize, drain, and verify that the section is safe to open. Support the pipework and any heavy valves before disturbing the connection.
Locate the leak before choosing the repair
Water can travel along a pipe surface or collect beneath a flange, making the visible drip misleading. From a safe position, record where moisture first appears and whether it follows pump starts, temperature changes, or pressure fluctuations. After isolation, clean the area and trace staining around the flange, adjacent fittings, and valve connections.
A leak emerging between the flange faces points toward the sealing interface. Moisture originating from a crack, casting defect, or nearby elbow requires a different investigation. Do not assume that the lowest wet bolt identifies the failed part of the gasket.
These observations narrow the investigation; none proves a cause by itself. A gasket damaged during assembly, for example, may also show uneven compression caused by misalignment.
Check whether the flanges meet without being forced
Before dismantling, record the gap around the joint and any visible offset. Once the pipework is safely supported and the joint released, check whether the mating flanges sit naturally in their intended position. Their faces should meet within the permitted alignment tolerances, with bolt holes lining up without using the bolts to drag the pipe into place.
A wedge-shaped gap suggests angular misalignment. Faces that appear parallel can still be offset sideways. If the pipe moves when the bolts are released, the connection may have been carrying installation strain. Support the assembly throughout this check: movement can be sudden, particularly near heavy valves or unsupported fittings.
For ductile iron piping, inspect supports, settlement, valve weight, and connections to rigid equipment. A flange beside a pump may be reacting to pipe strain elsewhere. Tightening that flange harder can increase local stress without correcting the underlying geometry.
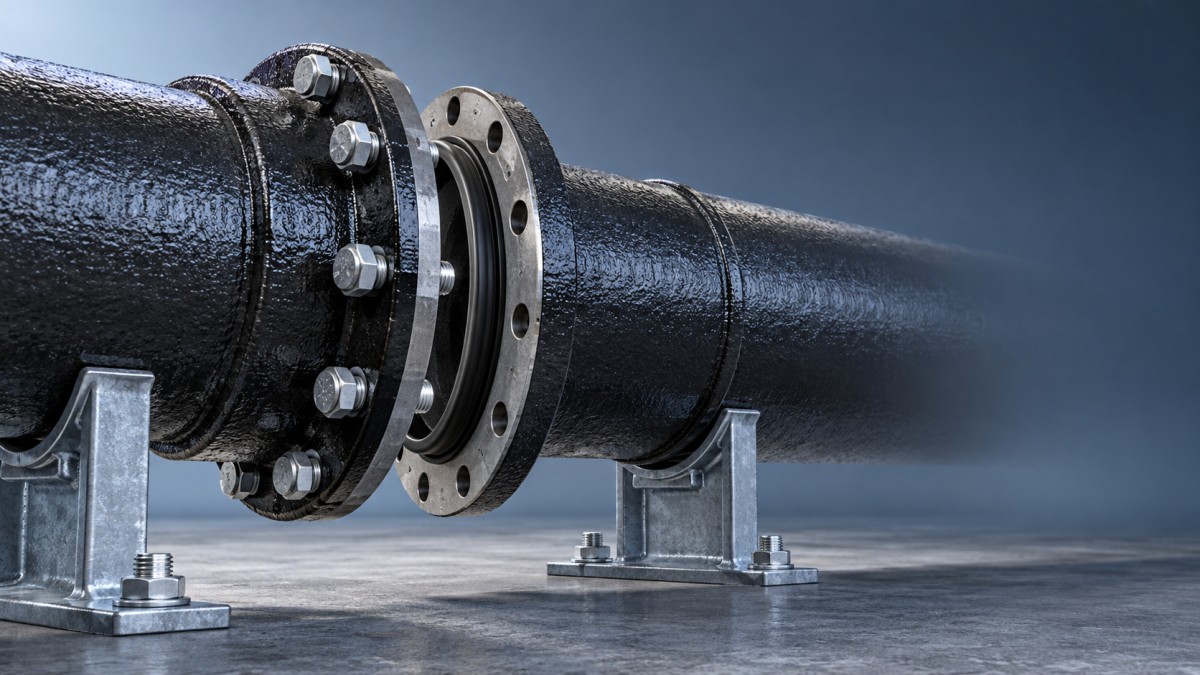
Do not use flange bolts as alignment tools. Correct the pipe position, supports, or component arrangement before rebuilding the joint. Also verify flange compatibility. Matching bolt holes alone does not establish that the face geometry, gasket seating arrangement, and pressure designation are suitable together.
Read the gasket and flange faces together
Remove the old gasket carefully and retain its orientation long enough to compare it with the flange faces. A heavily compressed area opposite a lightly marked area suggests uneven contact. Cuts, folded edges, or displaced sections can indicate installation damage or poor centering. Swelling, softening, hardening, and cracking can indicate that the material is unsuitable for the service conditions.
These marks are evidence, not a complete diagnosis. A distorted gasket may be the result of flange movement rather than the original reason for leakage.
Select the replacement by checking:
- Fluid and temperature compatibility: the sealing material must suit the conveyed medium, cleaning chemicals, and operating temperature.
- Dimensions and flange arrangement: the bore, outside diameter, thickness, and gasket style must match the intended connection.
- Required compression: the gasket must seal within the loading limits of the flange assembly.
- Service requirements: drinking-water applications, for example, require suitable materials for contact with potable water.
A rubber ring intended for a socket joint is not interchangeable with a flange gasket simply because both fit the nominal pipe size. Likewise, a thicker gasket is not a reliable cure for a damaged face or misalignment.
Clean the seating surfaces without gouging them. Look for corrosion pits, embedded debris, coating damage, and scratches that cross the sealing path. Remove old gasket material using a method appropriate to the surface. A new gasket cannot reliably compensate for significant face damage; the affected component may require an approved repair or replacement.
Bolt torque matters, but it does not directly measure sealing load
Torque is the turning force applied to a fastener. Bolt tension is the clamping force that compresses the gasket. Friction in the threads and beneath the nut affects how much tension a given torque produces. Corroded threads, inconsistent lubrication, or different fastener finishes can therefore create uneven loading even when the wrench shows the same value.
Use the specified tightening procedure for the actual flange, gasket, and fastener combination. A generic torque chart based only on bolt diameter may overlook the limits of the ductile iron flange or the compression needs of the gasket. Lubrication must also match the procedure: applying lubricant to a value intended for dry threads can substantially change bolt tension.
During reassembly, inspect fasteners and replace damaged or unsuitable items. Use washers where specified, check adequate thread engagement, and confirm that nuts turn freely before loading. Tighten in the prescribed cross-pattern and incremental passes so that compression develops evenly. Complete any specified final verification pass.
Repeatedly tightening the bolt nearest a leak can distort the loading further. If a correctly assembled joint still leaks, stop and investigate instead of continually increasing torque. Perform any required retightening only under the conditions stated in the assembly procedure.
Keep flange repairs separate from pipe-body repairs
If inspection traces the leak to the body of an adjacent elbow, the repair decision changes. A fitting-specific option such as a 90° Elbow Split Repair Clamp may be relevant for assessment. Its suitability depends on the elbow geometry, defect location, service conditions, and the repair product’s stated application.
That assessment does not establish suitability for a leaking flange interface. A clamp cannot be assumed to correct flange misalignment, restore gasket compression, or repair a cracked flange. Identify the leaking component before selecting hardware.
Return the joint to service with evidence of the correction
Before closing the job, confirm that the identified cause has been addressed. A replacement gasket should have a documented material and size; corrected alignment should remain acceptable with the pipe properly supported; and tightening should follow the applicable assembly procedure.
Restore service gradually using the system’s commissioning and pressure-test procedure, with appropriate venting and safe observation. Check the joint under the operating conditions associated with the original leak. A dry joint at steady pressure may still need observation during normal pump cycling or temperature changes.
Record the leak location, gasket condition, flange-face findings, support corrections, and tightening procedure. If leakage returns, these details help distinguish a continuing assembly problem from a change in operating conditions—and prevent another gasket replacement from becoming the default repair.
Navigation
Send Us A Message

First class quality service and professional after-sales team.
Get in Touch
*We respect your confidentiality and all information are protected.