What Are Pipe Unions, and Where Do They Simplify Valve Maintenance?
Pipe unions make valve maintenance easier by providing a connection that can be separated without rotating the adjoining pipes. They are useful when a threaded valve would otherwise be trapped between fixed pipe sections. With suitable connections on both sides and enough clearance, the valve can be removed without cutting the line or dismantling surrounding pipework.
The benefit depends on the whole installation. A union does not isolate pressure, correct pipe misalignment, or guarantee space to lift a valve out. In ductile iron systems, flanges, restrained couplings, or dismantling joints may provide a more suitable maintenance connection, particularly on larger mains.
How pipe unions create a removable connection
A typical pipe union has three main parts: two mating ends and a central nut that draws them together. Each end connects to its own section of pipe or equipment. The nut brings the sealing surfaces into contact while allowing the connected pipes to remain stationary.
Depending on the design, the joint seals through matched metal seating surfaces, a gasket, or an O-ring. The central nut supplies the clamping force; its threads generally do not form the fluid seal. This distinction matters when diagnosing a leak: adding thread tape to the union nut will not repair a damaged seat or an unsuitable gasket.
Once the system has been safely isolated and depressurized, loosening the nut releases the connection. The mating ends still need enough movement to separate, and the component needs a clear removal path. “Detachable” does not mean a valve can slide out of tightly fixed pipework with no clearance.
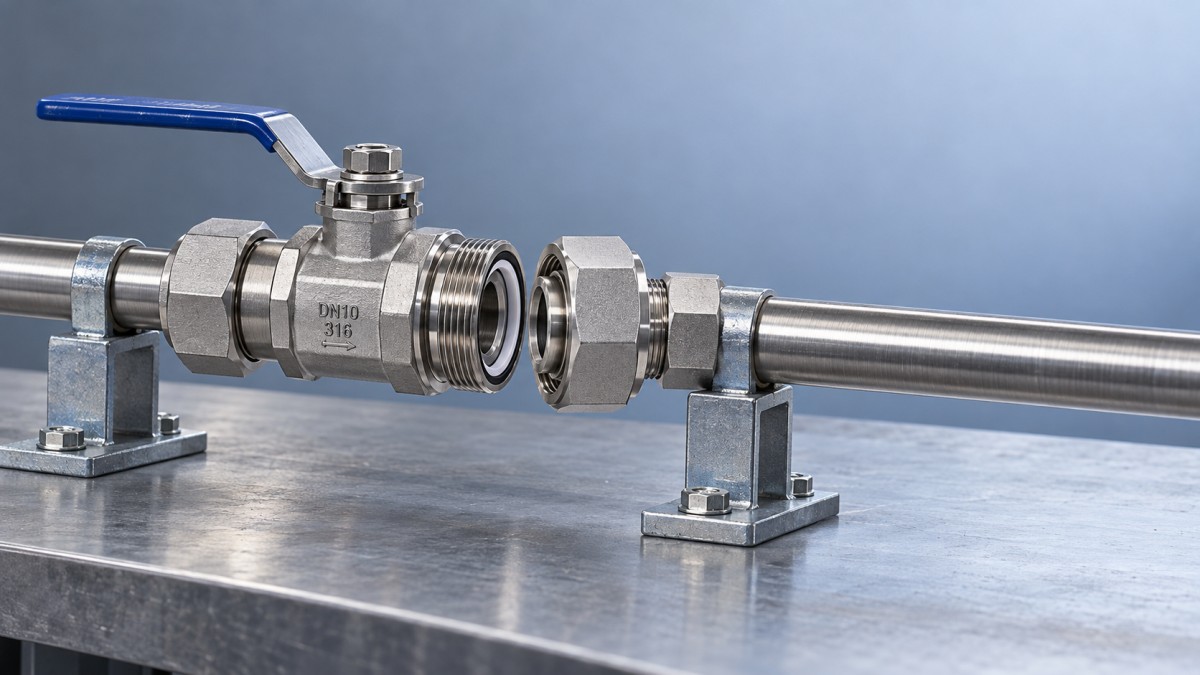
A standard threaded coupling works differently. It usually joins pipes by engaging their threads, so disconnecting it can require rotating a pipe or another component. A union provides a deliberate separation point for future servicing.
Where the maintenance benefit is greatest
Unions are particularly useful around serviceable components in smaller building-services and process pipework, where threaded connections are appropriate for the fluid and operating conditions. Typical locations include accessible valve assemblies near pumps, strainers, meters, and other equipment that may need removal.
Consider a threaded control valve installed between two fixed pipe runs. Without detachable connections, removing it may require backing out several fittings. A union on each side can allow the valve assembly to disconnect while the surrounding pipe stays in place. A valve with purpose-designed union ends can provide similar access, subject to its removal arrangement.
One union may be sufficient in some layouts, but it does not automatically make a valve removable. If the opposite valve connection remains threaded onto a fixed pipe, the valve may still need to rotate. The handle, actuator, nearby wall, or adjacent equipment can prevent that movement. The useful question is: “After the connections are released, how will this valve physically come out?”
Unions add less value where a valve can already be serviced in place through a removable bonnet or cartridge, although eventual body replacement may still justify detachable connections. They are also a poor maintenance provision when buried, concealed behind permanent finishes, or positioned where a wrench cannot reach the nut.
For ductile iron piping, compare the complete joint arrangement
Ductile iron pipework commonly uses socket-and-spigot joints, mechanical joints, or flanged connections. A small threaded union should not be treated as the default solution for removing a valve from a larger water main.
At a flanged valve, the bolts already provide a detachable connection. However, removing the bolts does not necessarily create enough axial clearance to release the valve and its gaskets. A suitable dismantling joint can provide controlled adjustment for installation and removal. Its restraint arrangement must match the system design.
These connections should be selected as part of an assembly. A detachable joint must still carry the required loads or work with the specified supports and restraints. In pressurized ductile iron systems, changing a connection can affect how pressure thrust is resisted.
What to check before selecting a union
Match the connection and sealing parts
Nominal pipe size alone does not establish compatibility. Check the connection type, thread standard where applicable, and the union’s mating geometry. Union halves from different manufacturers or product series may appear similar yet have incompatible seats or nut threads. Use a matched assembly unless interchangeability is expressly established.
Also distinguish the union seat from its pipe-end connections. A threaded pipe end may require an appropriate thread sealant, while the union seat may require clean metal faces or a specific sealing ring. Applying sealant indiscriminately can interfere with seating or contaminate the system.
Check operating conditions across the assembly
Select the body and seal materials for the conveyed fluid, operating temperature, pressure, and external environment. Hot water, treated water, oils, and chemical solutions can impose different requirements on elastomers. Dissimilar metals may also need consideration where the service conditions create a corrosion risk.
Pressure capability belongs to the complete installed assembly. A higher-rated union cannot compensate for a lower-rated valve, unsuitable pipe threads, or an incompatible gasket. Temperature can change the allowable pressure and seal suitability, so a room-temperature pressure figure alone is insufficient.
Allow access and support the valve
Leave room for tools to engage the union and for the nut to move back as required. Check the valve’s removal path, including its actuator or handle. A compact layout can look convenient during installation while making later servicing difficult.
Support heavy valves and actuators independently where required. The union should not be used to pull misaligned pipe ends together or carry loads the installation was not designed to impose. Pipe strain can distort the seating arrangement and contribute to recurring leaks.
Opening a union safely—and avoiding leaks afterward
A union is a connection, not a shutoff device. Before opening it, isolate every possible source of pressure and flow, including bypasses or connected equipment. Drain and vent the affected section, allow hazardous temperatures to fall, and verify that pressure has been relieved. A closed valve can pass fluid, so its handle position alone does not prove safe isolation.
Support the component before releasing its connections. Use suitable tools and counterhold the adjoining fitting so that loosening the union does not twist another threaded joint. Follow the installation’s isolation procedures and the fitting manufacturer’s assembly instructions.
During reassembly, inspect the seating faces and any gasket or O-ring. Dirt, scratches, corrosion, and displaced seals can prevent proper sealing. Replace damaged sealing components with the specified type. Tightening harder may worsen the problem if the underlying cause is misalignment or a damaged seat.
Restore service gradually and check the disturbed connections for leakage. If a joint leaks, safely isolate it again before investigating. Repeatedly tightening an assembled union under pressure is not a sound troubleshooting method.
Before choosing a maintenance connection, establish the valve’s end connections, the pipe material and size, the operating conditions, and the available removal space. Then trace the removal sequence. If it requires bending fixed pipe, forcing sealing faces apart, or rotating trapped equipment, the arrangement still needs adjustment—even if it includes a union.
Navigation
Send Us A Message

First class quality service and professional after-sales team.
Get in Touch
*We respect your confidentiality and all information are protected.